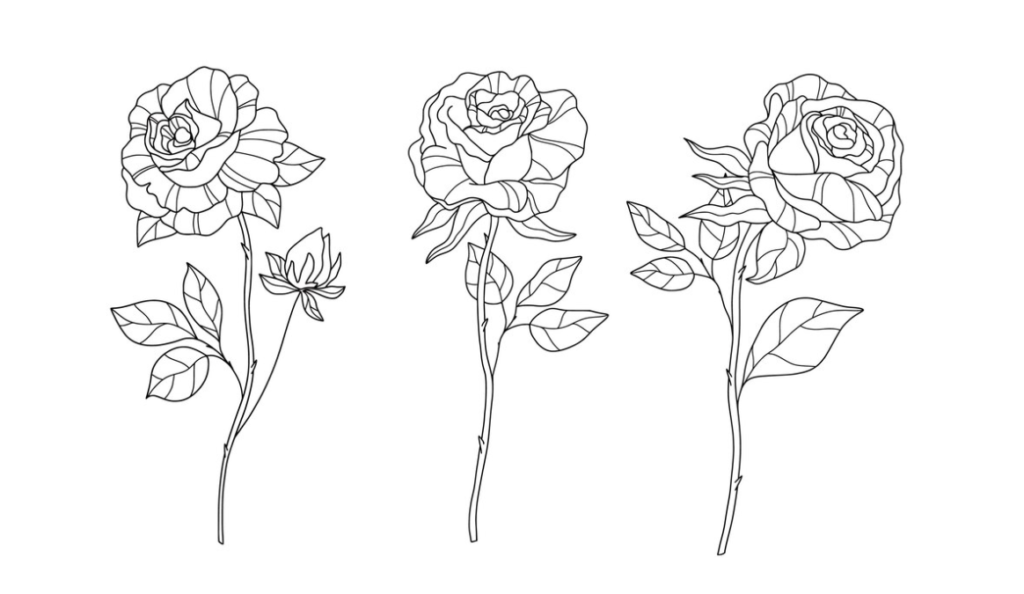
Are you eager to explore a new artistic endeavor but are uncertain about what to take on next? A suggestion to consider is a pencil sketch of a rose, one of the most beloved and frequently depicted flowers. The complicated appearance of this flower may seem daunting, but you’ll find it surprisingly manageable with guidance.
Let us walk you through a simple, beginner-friendly tutorial to craft an exquisite rose illustration. Using uncomplicated shapes and curved lines, you’ll master the art in no time.
Materials Needed for Creating a Captivating Rose Sketch
Kickstart your rose drawing journey with the basic tools of paper and a pencil. Enhance the crispness of your completed work with fine-tipped markers. Renowned for their precision and vibrant colors, these markers can transform your sketch into a living, breathing rose.
The recommended drawing sequence begins with light pencil strokes for the initial sketch, allowing easy correction of potential errors. Once the basic structure is satisfactory, you can add an outline using a colored marker or pencil to bring your creation to life.
Step-by-Step Instructions to Draw a Rose
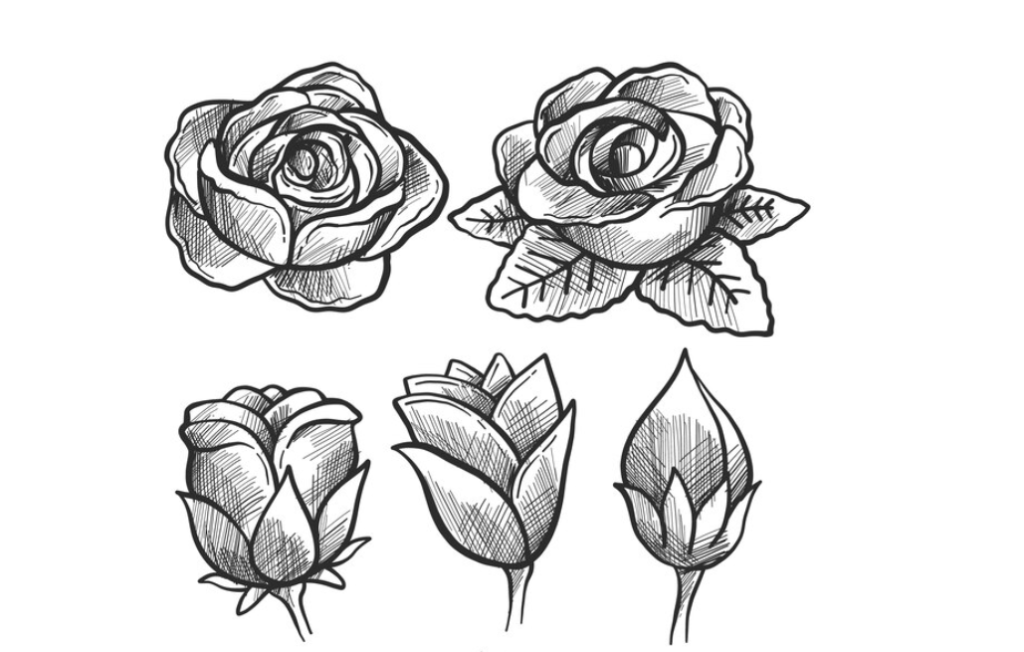
- Step 1: Launch your sketch by crafting three small circles, each slightly larger than its predecessor. Frame these with a pointed petal created with two curved lines forming a V shape at the top. These circles form the rose’s center and can be perfect circles or slightly oval, depending on your preference;
- Step 2: Next, draw an expanded petal extending from the rose’s center. This is achieved by sketching a heart shape, pointing back to the three small circles from the previous step. For a seamless flow, connect this with the smallest circle made earlier. You’ve now formed your first set of petals;
- Step 3: Unleash your creativity for this step. Add four layers to the rose to enhance depth and volume. These additional layers will serve as the inner petals. Create two curvy lines on each side of the rose’s center and add a small outer petal with minor bumps. Also, draw a semi-circle shape under the flower;
- Step 4: Now, it’s time to sketch the rose’s outer petals. Surround the inner petals with five large, rounded petals. To capture the natural irregularity found in real roses, make each petal a unique shape – some pointed, others smooth;
- Step 5: This step involves detailing. Add a few lines to signify the folds and shadows of a real rose. Each petal may have one or two lines;
- Step 6: Next is the stem of the rose. Simply draw a long, delicately curved line, blunt at the end, extending upwards to meet the base of the flower. It just requires a couple of vertical lines for the perfect stem;
- Step 7: Use a small triangular shape, combined with a teardrop shape, to draw the leaf. Position it slightly upwards to prevent a droopy look;
- Step 8: Add a long vertical line down the center of the leaf, with a few smaller lines branching outward to serve as veins.
And voila! You’ve created a beautiful rose sketch.
Coloring: Bringing Your Rose to Life
Absolutely! You’re more than welcome to color your rose. Applying colors can indeed animate your sketch, making it more visually appealing. You can employ colored pencils or markers to splash colors onto your drawing. A single color, various shades, or even a rainbow of colors – the choice is yours!
When to Sketch a Rose
There’s no specific time assigned for art. You can indulge in rose sketching whenever you wish. It serves as a perfect decompression tool, allowing your mind to unwind while your hands are busy. Whether for a special occasion such as Mother’s Day, Valentine’s Day, or a random time when inspiration strikes – each moment is perfect for art.
Apart from being a delightful pastime, sketching roses can offer several benefits. A well-drawn rose can be the perfect handmade gift for a loved one or a striking piece of art to adorn your living space. The skill of rose sketching can also come in handy when you want to personalize greeting cards or craft home-made décor.
Steps to Advance Your Rose Drawing Skills
Once you master the basic skills, the next step is to perfect your details. Start by adding shaded regions to your petals. These shaded areas will create an illusion of depth in your rose and make it look more life-like. Remember, there is no such thing as a perfect rose – each one is unique in its own way!
Learning to draw a rose may seem daunting initially due to its intricate appearance. However, with step-by-step instructions and practice, you can easily master this art. Whether you’re drawing to unwind, to prepare a personal gift, or to decorate your space, a hand-drawn rose always remains a beautiful classic. After learning how to draw a rose, check out “The Ultimate Guide to Animal Drawing” to expand your drawing skills to include various animals.
Conclusion
Mastering the art of sketching a rose might seem challenging at first, but with a step-by-step guide and plenty of practice, it becomes an enjoyable and rewarding process. The ability to bring the beauty and intricacy of a rose to life on paper is a skill that serves as both a pleasing pastime and a creative outlet. It’s a lifelike illustration that could adorn your home, embellish a greeting card, or serve as a thoughtful, handmade gift. So pick up a pencil, follow the instructions, and let your creativity bloom as you uncover the delight of drawing a rose.