Drawing hair is universally regarded as one of the more intricate aspects of sketching. With its fluid movement, variable styles, and complex form, hair drawing demands patience and practice. Among hairstyles, braids especially, with their distinctive and particular construction, often come across as daunting to many. However, like all artistic challenges, they follow a systematic method that can be mastered over time. While mastering the art of drawing a simplified braid is a valuable skill, you can further enhance your artistic repertoire by exploring tutorials on how to draw animals, expanding your creative abilities and diversifying your artistic expressions.
Bearing in mind the complexity of braiding, we’ve developed a straightforward tutorial for efficiently and effectively sketching braids. This manual outlines step-by-step instructions to improve your drawing technique and includes suggestions to refine and customize your artwork.
Fundamentals to Drawing a Braid
- Begin sketching a braid by drawing a straight line down your paper with a pencil;
- This line serves as a foundational guide for your drawing;
- Next, create a wide, wavy line following this guide, using a reference picture to determine the curve’s width;
- As you become more adept, transition from pencil to pen for your lines.
Steps to Drawing a Braid
Step 1
- Kickstart your drawing by adding the first two braids;
- We suggest starting with the right braid first;
- Draw a long, curved line from the bend of the initial wavy line;
- Then, add another line further up to shape the other side of the strand;
- Follow the same process for the left side.
Step 2
- After mastering the first two braids, expand your braid by adding more strands;
- Use curved lines extending from the already drawn braids down to the wavy center line.
Step 3
Continue with more braids, making them progressively smaller as you approach the bottom of the braid.
Step 4
- Next, focus on adding the final strand with one more curved line, and start crafting the bottom of the braid;
- Two curved lines almost converging but not quite meeting should do the trick.
Step 5
- Once the main part of your braid is complete, add a ponytail shape at the end of the braid to finish it off;
- Use a blend of curved and straight lines to get it right.
Step 6
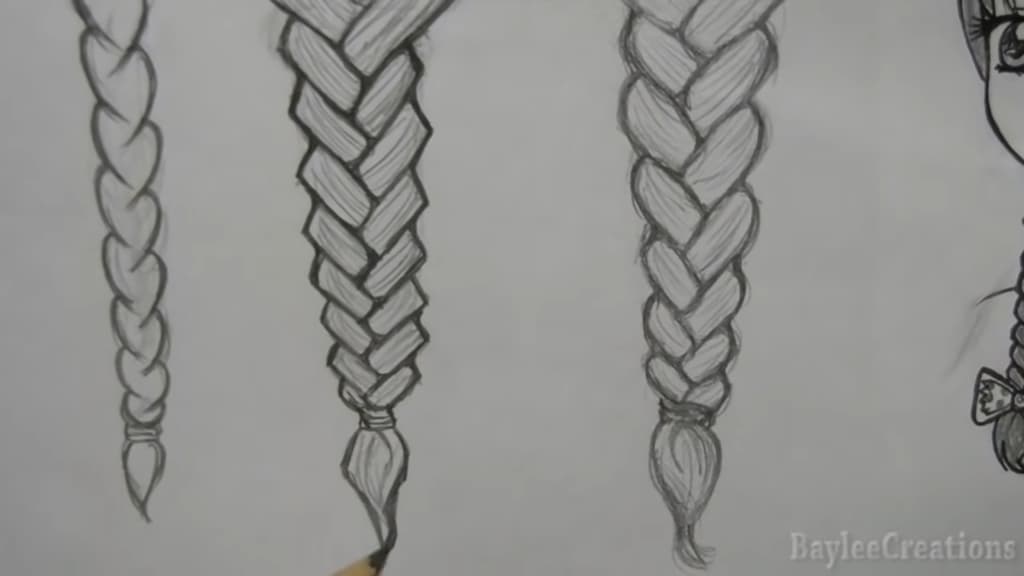
- When you’re done with the structure, pay attention to the finer details;
- Add thin lines to create the illusion of separate hair strands;
- There’s no right or wrong in this step; you should follow what looks best to you.
Expanding Your Drawing Skills: Different Types of Braids
The classic braid presented so far is just the starting point. Braids come in a myriad of styles, shapes, and sizes. You can experiment with different styles, taking inspiration from online images or real-life examples. Personalize your braid with accessories like hair clips, ribbons, or even tiny flowers. If you’re feeling adventurous, you could also incorporate the braid into a character, creating a unique personality with the braid as a defining characteristic.
From Sketch to Color: Adding Life to Your Braid Drawing
In the concluding phase of mastering braid drawing, the application of color is where your creativity can really sparkle. Opt for shades that mirror your own hair color, incorporate designs of a beloved hair accessory, or employ diverse shading methods to give your braid sketch distinctiveness. Embrace the freedom to try different coloring tools, such as acrylics, watercolors, colored markers, or pencils, to achieve the desired appearance.
Quick Tips to Simplify Your Braid Drawing
Drawing complex braids can seem overwhelming at times. Here are a few tricks to make your drawing process easier:
| Strategy | Description |
|---|---|
| Simplify the design | Instead of focusing on intricate details, sketch a more cartoonish version of the braid with fewer details. This approach reduces complexity and focuses on the basic shape and form of the braid. |
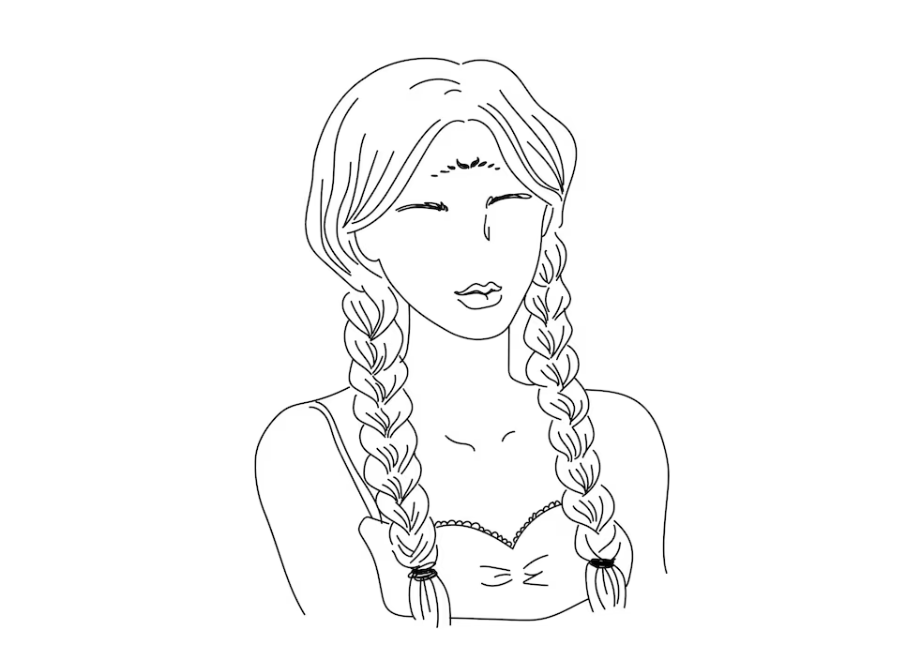
| Incorporate into a larger image | Make the braid part of a larger figure, such as a cartoon character’s head. This shifts the focus from the intricate details of the braid to the overall picture, allowing the braid to blend naturally into the scene. |
| Use real-life references | If possible, use a real braid as a reference for your drawing. If this isn’t feasible, use online photos as a guide. Real-life references can provide a good balance between detail and simplicity, helping you capture the essence of the braid. |
Perfection in drawing a braid, like any other art form, comes with practice. So, pick up your pencil, follow the steps, and let your creativity flow! Remember, there are countless possibilities awaiting exploration. From altering braid styles to experimenting with color and accessories, let your imagination guide your art.
Conclusion
Achieving perfection in sketching something as intricate as a braid can be a challenging journey, but remember, the key to success lies in persistent practice and patience. This comprehensive guide aimed to simplify the process and encourage your artistic exploration. The wide array of braid styles, colors, and embellishments to experiment with means your creativity can truly flourish. Keep honing your skills and who knows, you might create a masterpiece that truly stands out.